


I’ve always found photography
to be a fascinating thing, but without the access to a DSLR camera or the
patience to learn how to use it, iPhone photography is about as fancy as I get.
Plus my phone is always near me, making it much handier than the camera.
Thankfully technology has come a long way, and relying on your phone to take
pictures doesn’t mean you’re doomed to low quality photos, especially when
you consider all the photo editing apps available to help. When I
look at the near 3,800 photos in the camera roll on my phone (yes, I
think this is a ridiculous number and no I don’t care. Ha!) I also realize that
my favorites are almost always the candid shots.
For me this developed out of
necessity because I have a very stubborn husband who most often will not pose
for a picture, so if I've been forced just to snap whatever I can get. But over
time I've come to appreciate these more. I'd rather look back on pictures and
remember how goofy my husband and son were being with each other on
Easter Sunday, capture my husband and son having their own little moment
and be reminded of exactly what I was feeling at that point in time. To me,
that captures the moment and the feelings that went with it more than our posed
smiles. (Although don't get me wrong, I'd like my fair share of those pictures
too please!)
So for
fun, today I’m sharing some of my favorite iPhone pictures and the apps that
helped me edit them! (I checked, and it looks like all these apps are available for Android phones too)
App
Needed: Camera+ ($2.99) or Afterlight ($0.99)
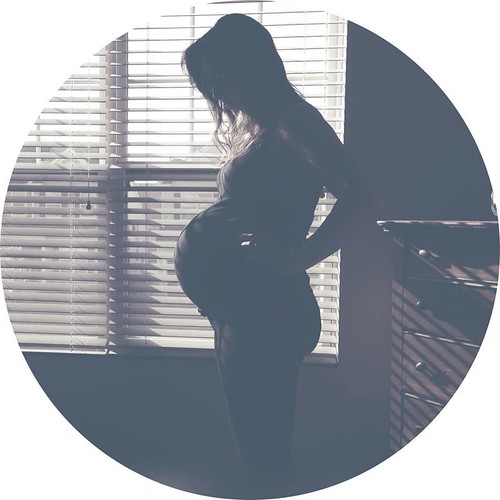
We
didn’t take the time or spend the money on maternity photos, but I don’t
feel cheated of that experience when I take a look at this picture. I found the
link to this tutorial by White House Black Shutters on one of those What To Expect When You’re Expecting discussion boards that I
would read from time to time for entertainment. If you read her post, I used
her original instructions with the Camera+ app because I already had the app
downloaded, but she’s since updated it to include instructions using
Afterlight, another app I use regularly.
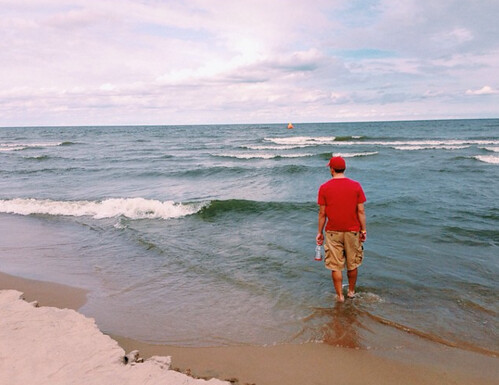
App
Needed: VSCO Cam (free)
Instructions:
G3 filter
My husband did a full triathlon (2.4 mile swim, then 112 mile bike, then 26.2 mile run) when I was almost 8 months pregnant and I couldn't help but capture this look of him testing the water temperature the day before the race, focused and deep in thought. Taking an off center photo makes it even more candid.
App
Needed: Afterlight ($0.99)
Instructions:
In filters, go to original category, select Ash, then adjust the brightness
until you get the look you like.
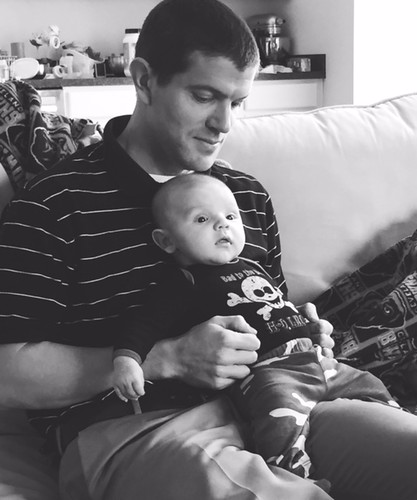
Sometimes
I take a picture and then I look at it and my attention is immediately drawn to
background. In the original of this picture, you could tell that the blanket on
the couch is orange, the wall in the kitchen is teal, and you could see all the
clutter on the kitchen counter – these are the things I felt my attention being
drawn to rather than to my husband and my son. For me, turning a picture into
black and white makes the background noise fade away, drawing my attention back
to what it should be focused on.
App
Needed: Fotograf ($1.99)
Instructions:
Filter is Matt Dev 9, as simple as that.
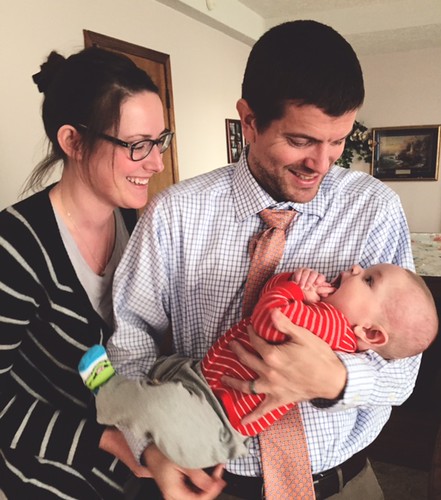
To be
fair, we started out trying to capture a posed picture but with college
basketball on the tv behind the family member who took this picture and 5 month
old babies not really understanding the concept of posing for a picture, it was
pretty much a lost cause. This ended up being my favorite of the shots captured
because it showed a moment where we’re truly being “us”.
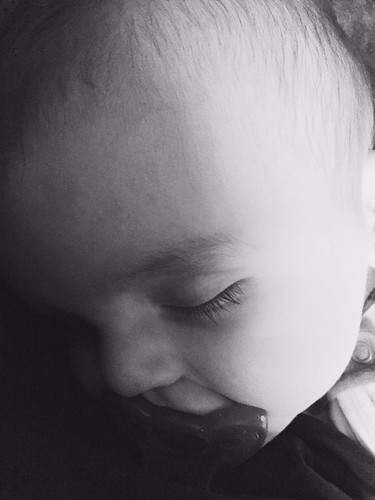
App
Needed: Afterlight ($0.99)
Instructions:
In filters, go to original category, select Coal, then once again just adjust
the brightness until you get the look you like.
Going
for the candid shot means you’re not always going to have the opportunity to be
in the perfect lighting for a photo. Turning a picture into a black and
white shot also works great for saving a shot when the lighting is really bad.
Like here – I was rocking Jacob and was all of a sudden struck by how long and
beautiful those eye lashes look! We were in a dark room with the blinds closed
and the picture quality was awful. But do you think I was going to try to move
to better lighting and risk waking my kid up? Yeah right! :)
Any tips or other apps you've found that work for you? I'm always looking for more!
Any tips or other apps you've found that work for you? I'm always looking for more!
No comments:
Post a Comment